Quick Overview
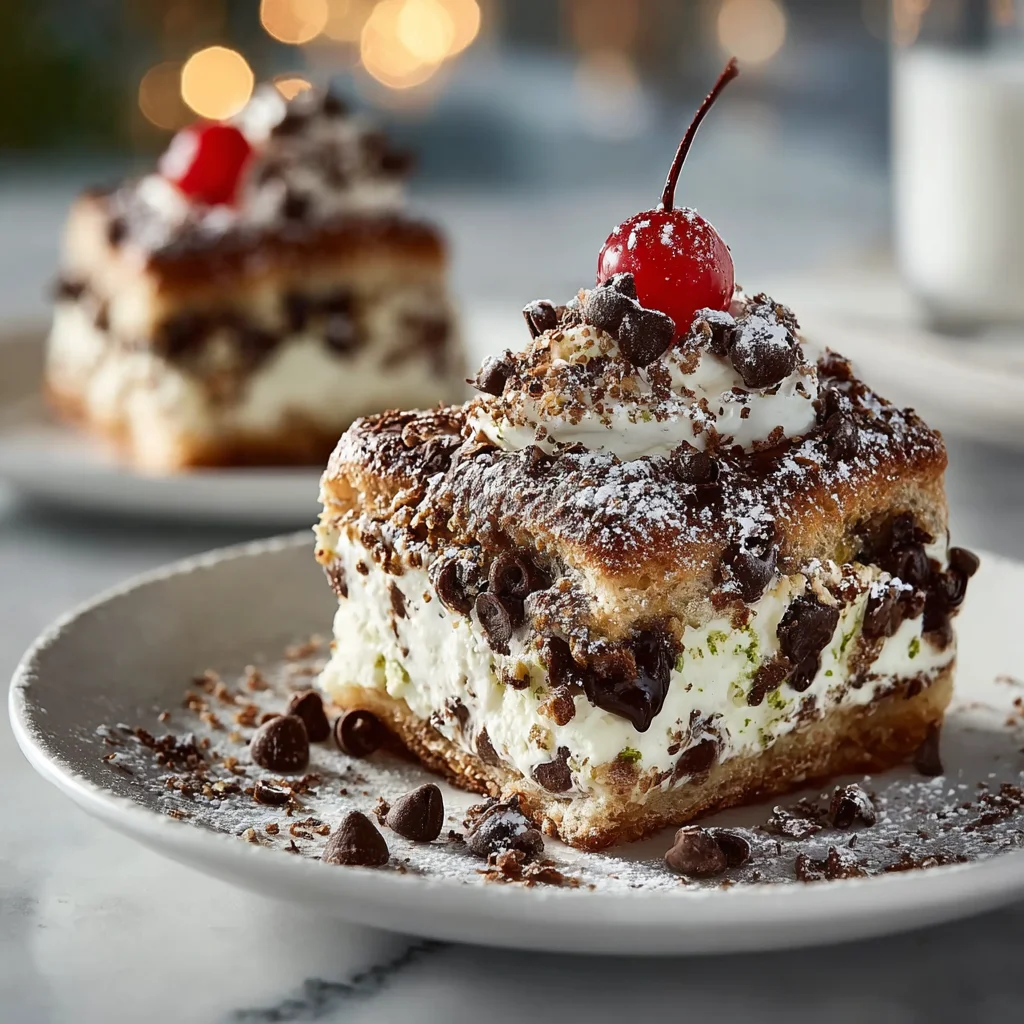
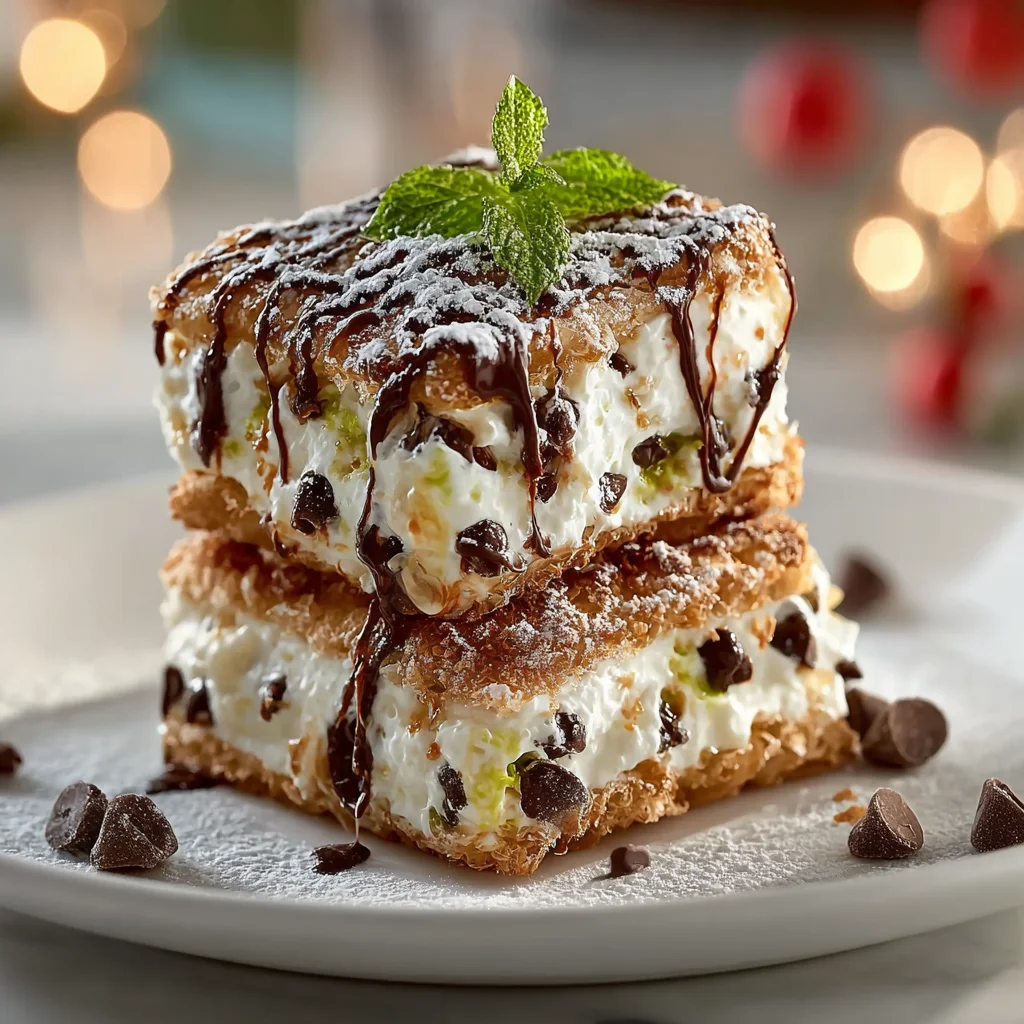
Classic cannoli squares offer a delightful twist on the traditional Italian pastry. This dessert combines the rich flavors of a classic cannoli with an easy-to-make square format. Whether you’re hosting a gathering or simply craving something sweet, these cannoli squares are sure to impress. With creamy filling and a crispy base, they bring the taste of Italy right to your kitchen. Let’s dive into this mouthwatering recipe that balances simplicity and indulgence perfectly.
Ingredient Breakdown
H4 Dough Ingredients
- **All-purpose flour (2 cups)**: Provides the structure for the dough. It helps create a sturdy base for the filling while ensuring a light texture.
- **Granulated sugar (1/4 cup)**: Adds sweetness to the dough, balancing out the rich filling and enhancing overall flavor.
- **Salt (1/2 teaspoon)**: A small amount of salt enhances the flavors in both the dough and filling.
- **Unsalted butter (1/2 cup)**: Adds richness and moisture to the dough, creating a tender texture.
- **Egg (1 large)**: Acts as a binder for the dough, helping it hold together during baking.
H4 Filling Ingredients
- **Ricotta cheese (15 oz)**: The star ingredient that gives cannoli its signature creamy texture and flavor.
- **Powdered sugar (3/4 cup)**: Sweetens the filling while also giving it a smooth consistency when mixed with ricotta.
- **Vanilla extract (1 teaspoon)**: Adds depth of flavor to the filling, enhancing its sweetness and aroma.
- **Mini chocolate chips (1/2 cup)**: Provide bursts of chocolate flavor throughout the creamy filling.
H4 Topping Ingredients
- **Powdered sugar (for dusting)**: Sprinkled on top just before serving for a touch of sweetness and visual appeal.
- **Chopped pistachios (optional)**: Adds crunch and color as a garnish; they complement the sweet flavors beautifully.
Step By Step Recipe: Classic Cannoli Squares
H4 Prepare the Dough
Start by preheating your oven to 350°F (175°C). In a large mixing bowl, combine flour, granulated sugar, and salt. Mix these dry ingredients well before cutting in unsalted butter until it resembles coarse crumbs. Beat one egg in a separate bowl; add it to the dry mixture. Stir until combined into a soft dough. Wrap in plastic wrap and refrigerate for at least 30 minutes.
H4 Roll Out Dough
Once chilled, place the dough on a floured surface. Roll it out to about 1/8-inch thickness into a rectangle shape. Make sure it’s even throughout so it cooks uniformly. Carefully transfer this rolled-out dough into an 8×8-inch baking pan lined with parchment paper. Press down gently to fit perfectly into all corners without tearing.
H4 Bake Base Layer
Bake the prepared dough in your preheated oven for about 20-25 minutes or until golden brown around the edges. Keep an eye on it to prevent over-baking. Once done, remove from oven and allow it to cool completely in the pan before adding any filling.
H4 Prepare Filling
In another bowl, combine ricotta cheese with powdered sugar and vanilla extract using an electric mixer on medium speed until smooth and creamy. Add mini chocolate chips gently folding them into the mixture using a spatula until evenly distributed throughout.
H4 Assemble Cannoli Squares
Once both layers are cool, spread ricotta filling evenly over the baked base layer using an offset spatula or spoon. Make sure to cover all edges adequately so every bite is filled with deliciousness!
H4 Chill Before Serving
Cover with plastic wrap or aluminum foil tightly without touching the filling. Refrigerate for at least 2 hours or overnight if possible; this allows flavors to meld together nicely while setting up properly.
H4 Cut Into Squares
Once chilled sufficiently, remove from refrigerator carefully uncovering it without disturbing top filling layer too much. Use a sharp knife or pizza cutter to slice into squares of desired size – typically about 2 inches works well for serving portions.

Serving and Storing Tips
H4 Serving Suggestions
Serve classic cannoli squares chilled straight from refrigerator after dusting lightly with powdered sugar on top for added sweetness! Consider garnishing individual pieces with chopped pistachios for an extra crunch if desired; they pair beautifully with creaminess of filling!
H4 Storage Instructions
Store any leftover squares in an airtight container in refrigerator where they can last up to three days maximum without losing quality! Avoid freezing as this may alter texture significantly upon thawing making them less enjoyable when served later.
Now you have everything you need to make these delightful classic cannoli squares at home! Enjoy creating this delicious treat that’s bound to become a favorite among friends and family alike!
Mistakes to avoid
When making Classic Cannoli Squares, one common mistake is overfilling the squares with filling. Too much filling can lead to a messy presentation and an unbalanced flavor. Instead, fill each square generously but carefully, ensuring even distribution without overflowing.
Another mistake is not chilling the filling long enough before assembling. A warm filling can make the squares soggy and difficult to handle. Allow at least one hour in the refrigerator to let the flavors meld and achieve the perfect consistency.
Using stale or low-quality ingredients can also ruin your Classic Cannoli Squares. Fresh ricotta cheese and quality chocolate chips are crucial for a delicious dessert. Always choose high-quality ingredients to ensure a delightful taste.
Neglecting to preheat your oven adequately may lead to uneven baking. Always preheat your oven for at least 15 minutes before baking. This ensures that your squares rise evenly and develop that perfect golden crust.
Lastly, skipping the dusting of powdered sugar before serving can diminish the visual appeal of your Classic Cannoli Squares. A light sprinkle enhances presentation and adds a touch of sweetness that complements the dessert beautifully.
Tips and tricks
To make Classic Cannoli Squares successfully, start by preparing your dough correctly. Use cold butter when making the crust, as this helps create a flaky texture. Combine flour, sugar, and salt in a bowl, then cut in butter until it resembles coarse crumbs. Gradually add cold water until the mixture forms a dough. Chill it for at least 30 minutes before rolling out.
For the filling, use whole milk ricotta for creaminess and flavor. If you want an extra smooth texture, strain the ricotta through cheesecloth before mixing it with sugar and vanilla extract. This step ensures that there are no lumps in your filling and gives you that classic creamy taste associated with cannoli.
When cutting your squares, use a sharp knife or pizza cutter to ensure clean edges. This not only improves appearance but makes serving easier too. For uniformity, aim for equal-sized squares, which will bake evenly and look appealing on the plate.
Don’t forget about adding flavor variations! While traditional recipes prefer vanilla extract, feel free to experiment with orange zest or almond extract for an exciting twist on classic flavors. Just remember to balance these flavors so they enhance rather than overpower the cannoli essence.
Lastly, serve your Classic Cannoli Squares chilled for optimal enjoyment. The cool filling contrasts beautifully with the slightly warm crust, creating a delightful eating experience that guests will love. Garnish with chocolate shavings or fresh berries for an elegant touch that enhances both presentation and flavor.
Suggestions for Classic Cannoli Squares
Consider pairing your Classic Cannoli Squares with fresh fruit like strawberries or raspberries for added color and flavor contrast on your dessert plate. The tartness of these fruits complements the sweet richness of the cannoli filling perfectly.
Serving alongside espresso or coffee can elevate your dessert experience further. The bold flavors of coffee provide a wonderful balance to the sweetness of Classic Cannoli Squares, making it an ideal end to any meal or gathering.
If you’re hosting a party, consider creating a dessert bar featuring these squares as part of a selection of Italian desserts like tiramisu or panna cotta. This variety allows guests to sample different treats while enjoying their favorites.
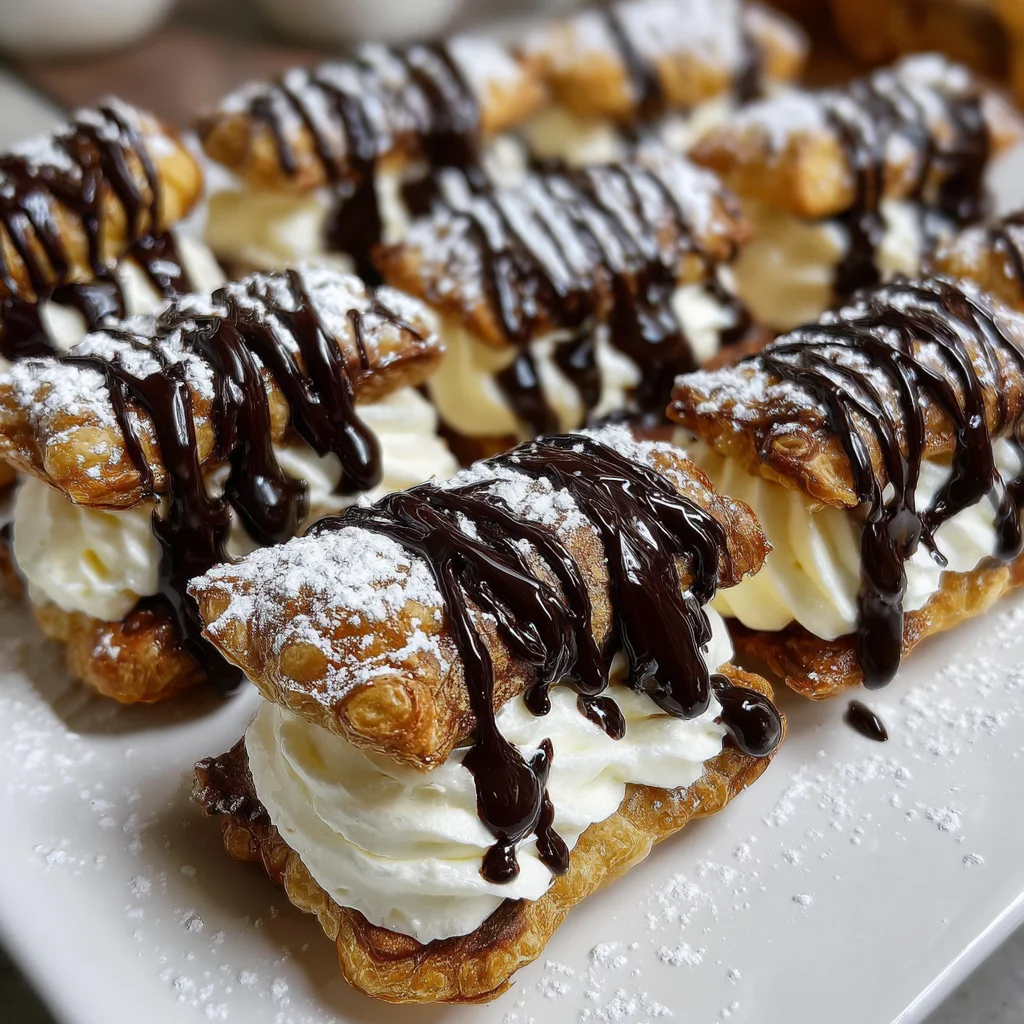
For those who love chocolate, drizzling melted dark chocolate over each square adds sophistication and decadence without overpowering the classic flavor profile of cannoli squares.
Lastly, consider making mini versions for bite-sized treats at gatherings! Cut smaller squares from your recipe so everyone can enjoy them without feeling too indulgent after their meal.
FAQs
What are Classic Cannoli Squares?
Classic Cannoli Squares are a delicious twist on traditional cannoli pastries made into easy-to-serve square bars. They feature layers of buttery crust filled with creamy ricotta cheese mixed with sugar, vanilla extract, chocolate chips, and often garnished with powdered sugar or chocolate shavings.
How long do Classic Cannoli Squares last?
Classic Cannoli Squares can be stored in an airtight container in the refrigerator for up to four days. However, it’s best to consume them within two days for optimal freshness and texture since the crust may become soft over time due to moisture from the filling.
Can I freeze Classic Cannoli Squares?
Yes! You can freeze Classic Cannoli Squares for up to three months if wrapped tightly in plastic wrap followed by aluminum foil or placed in an airtight container. To enjoy them later, simply thaw them overnight in the refrigerator before serving.
Can I make Classic Cannoli Squares gluten-free?
Absolutely! You can substitute regular all-purpose flour with gluten-free flour blends designed for baking when making your dough for Classic Cannoli Squares. Ensure all other ingredients used in fillings are also gluten-free to maintain compliance with dietary restrictions.
What variations can I try in my filling?
You can customize your filling by adding flavors such as orange zest or almond extract instead of vanilla if desired! Additionally, try incorporating chopped nuts like pistachios or hazelnuts along with chocolate chips for added texture and taste variation!
Are there any tips for decorating Classic Cannoli Squares?
To decorate your Classic Cannoli Squares elegantly, consider dusting them lightly with powdered sugar just before serving! You might also drizzle melted chocolate over them or top them with fresh berries—these additions elevate both flavor profiles and visual appeal!
Summary
In summary, creating delicious Classic Cannoli Squares involves avoiding common mistakes such as overfilling and using stale ingredients while implementing effective tips like proper chilling times and high-quality components for maximum flavor impact. Experimenting with variations adds excitement while thoughtful suggestions enhance enjoyment when serving these delightful treats—perfectly complemented by fresh fruit or coffee! Enjoy this delectable dessert responsibly while sharing it among friends family alike!